thumbnail

Beautiful Alert / Confirm / Toast message box create with HTML, CSS and JS only

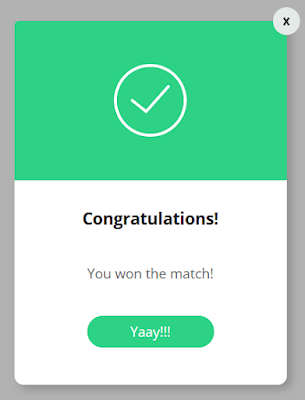
Cute Alert is javascript library that can create beautiful Alert, Confirm and Toast message easily without any dependency libraries.

Preview


Author: gustavosmanc
Official Page: Go to website
License: MIT
 

How to use it:

Add javascript script and css files into HTML page 
<link rel="stylesheet" href="./style.css"/>
<script src="./cute-alert.js"></script>
Just call "cuteAlert" function and provide required parameters "title", "message" and "type". Cute Alert can create 5 types of alert box. "success", "error", "warning", "info" and "question". 
cuteAlert({
    type: 'success', //Other options : error, warning, info, question
    title: 'TITLE HERE',
    message: 'MESSAGE HERE'
})

Question type dialog can set "confirmText" and "cancelText" optional parameters, by default they are set as "Confirm" and "Cancel" respectively. cuteAlert() returns a Promise, so you can use then function to execute an action after the alert box frame is closed.

cuteAlert({
    type: 'question',
    title: 'Quick reminder!',
    message: 'Are you sure?',
    confirmText: 'Yes',
    cancelText: 'No'
}).then(function(e){
    if(e == 'confirm'){
        alert('Thanks')
    }else{
        alert(':-(')
    }
})

Optional parameters 

buttonText : Text for button, by default it's set as "OK"
closeStyle : Close button style. Can set "circle" for close circle button.

Toast message

To show toast message, call cuteToast() function and pass type, message and timer parameters.
cuteToast({
    type: 'success', //Other options : error, warning, info
    message: 'MESSAGE HERE',
    timer: 5000,// milli second
})
thumbnail

Dockable Modal Window with dockModal.js

Create dockable dialog and modal windows by using dockModal.js javascript library.

Preview


Author: Bogdan-Lyashenko
Official Page: Go to website
License: MIT

Features:

  • Click the title bar to dock & undock the dialog.
  • Click the Expand icon to maximize the dialog just like a fullscreen modal.

How to use it:

1. Load the dockModal.js and dockModal.css in the document.

<script src="./src/js/dockModal.js"></script>
<link rel="stylesheet" href="./src/css/dockModal.css" />

2. Load the Font Awesome iconic font for the controls.

<link rel="stylesheet" href="https://use.fontawesome.com/releases/v5.15.0/css/all.css" />

3. Create a basic dock modal.

<div class="dock_modal_demo" data-title="Modal Title 1">    
  Modal Content
</div>
dockModal(document.querySelector(".dock_modal_demo"), {
  title: function() {
    return document.querySelector(".dock_modal_demo").getAttribute("data-title");
  },
});

4. Set the initial state: “modal” (default), “docked”, “minimized”.

dockModal(document.querySelector(".dock_modal_demo"), {
  initialState: 'docked'
}); 

5. Customize the appearance of the dock modal.

dockModal(document.querySelector(".dock_modal_demo"), {
  width: 400,
  height: "65%",
  minimizedWidth: 200,
  gutter: 40,
  poppedOutDistance: "6%",
  class: "",
  animationSpeed: 400,
  showPopout: true,
  showMinimize: true,
  showClose: false,
});

 6. Callback functions.

dockModal(document.querySelector(".dock_modal_demo"), {
  beforeCreate: undefined,
  create: undefined,
  open: undefined,
  beforeClose: undefined,
  close: undefined,
  beforeMinimize: undefined,
  minimize: undefined,
  beforeRestore: undefined,
  restore: undefined,
  beforePopout: undefined,
  popout: undefined
});
thumbnail

Collection of useful PHP snippets


(1) Convert myanmar numbers to english numbers
This function can convert non-english number to english numbers
function changeToEngNumber($numbers){
  return str_replace(
    ["၀", "၁", "၂", "၃", "၄", "၅", "၆", "၇", "၈", "၉"],
    ["0", "1", "2", "3", "4", "5", "6", "7", "8", "9"],
    $numbers);
}

Syntax :
convertToEngNumber("၂၀၁၅-၂၀၁၉"); //Result : 2015-2019 

(2) Download file from web link
function downloadFile($webLink, $filePath){
  $ch = curl_init($webLink);
  $fp = fopen($filePath, 'wb');
  curl_setopt($ch, CURLOPT_FILE, $fp);
  curl_setopt($ch, CURLOPT_HEADER, 0);
  curl_setopt($ch, CURLOPT_USERAGENT, 'Mozilla/5.0 (Windows NT 10.0; Win64; x64) AppleWebKit/537.36 (KHTML, like Gecko) Chrome/73.0.3683.103 Safari/537.36');
  curl_setopt($ch, CURLOPT_FOLLOWLOCATION, true);
  curl_exec($ch);
  curl_close($ch);
  fclose($fp);

  return $filePath;
}
Syntax :
downloadFile("https://www.example.com/my-photo.jpg", "C:/Users/User/Desktop/photo.jpg"); 

(3) Human readable file size (1.20 MB, 30.00 KB)
function readableFileSize($fileSize){
  $sizes = array('B', 'KB', 'MB', 'GB', 'TB');
  $i = 0;
  while($fileSize > 1024){
   $fileSize = $fileSize / 1024;
   $i++;
  }
  return number_format($fileSize, 2) .' '. $sizes[$i];
}
Syntax :
readableFileSize(filesize("C:/Users/User/Desktop/photo.jpg"));

(4) Check string contain in another string
function containString($InString, $searchTerm){
  return strpos($InString, $searchTerm) === 0;
}
Syntax :
containString("apple, orange, mango", "mango"); //Result : TRUE

(5) Multiline string in PHP
$textStr = <<<EOD
PHP is a popular general-purpose scripting language that is especially suited to web development.
Fast, flexible and pragmatic, PHP powers everything from your blog to the most popular websites in the world.
EOD;
(6) Send an email
<?php
 $to = '[email protected]';
 $subject = 'Here is subject';
 $message = 'This is long message';
 $headers = 'From: [email protected]' . "\r\n" . 'Reply-To: [email protected]' . "\r\n" . 'X-Mailer: PHP/' . phpversion();
 mail($to, $subject, $message, $headers);

(7) Detect mobile device
function isMobileDevice(){
 return preg_match("/(android|avantgo|blackberry|bolt|boost|cricket|docomo|fone|hiptop|mini|mobi|palm|phone|pie|tablet|up\.browser|up\.link|webos|wos)/i", $_SERVER["HTTP_USER_AGENT"]);
}
Syntax :
isMobileDevice(); //Result : TRUE if mobile device, otherwise, FALSE

(8) Create folder if not exist
function createFolder($folderPath){
 if (!file_exists($folderPath)){
  mkdir($folderPath, 0775, true);
 }
 return $folderPath;
}
Syntax :
createFolder("C:/TestFolder");

(9) Delete a file
unlink("C:/my-photo.jpg");

(10) Pretty DateTime
function timeAgo($timeAgo){
 $timeZone = new DateTimeZone('Asia/Singapore');
 $timeAgo = (new DateTime($timeAgo, $timeZone))->getTimestamp();
 $curTime = (new DateTime('now', $timeZone))->getTimestamp();
 $timeElapsed = $curTime - $timeAgo;
 $seconds = $timeElapsed ;
 $minutes = round($timeElapsed / 60 );
 $hours = round($timeElapsed / 3600);
 $days = round($timeElapsed / 86400 );
 $weeks = round($timeElapsed / 604800);
 $months = round($timeElapsed / 2600640 );
 $years = round($timeElapsed / 31207680 );
 
 // Seconds
 if($seconds <= 60){
  return "a moment ago";
 }
 //Minutes
 else if($minutes <= 60){
  return ($minutes == 1) ? "1 minute ago" : $minutes . " minutes ago";
 }
 //Hours
 else if($hours <= 24){
  return ($hours == 1) ? "1 hour ago" : $hours . " hours ago";
 }
 //Days
 else if($days <= 7){
  return ($days == 1) ? "yesterday" : $days . " days ago";
 }
 //Weeks
 else if($weeks <= 4.3){
  return ($weeks == 1) ? "one week ago" : $weeks . " weeks ago";
 }
 //Months
 else if($months <=12){
  return ($months == 1) ? "one month ago" : $months . " months ago";
 }
 //Years
 else{
  return ($years == 1) ? "one year ago" : $years . " years ago";
 }
}
Syntax :
timeAgo('2019-07-12T15:03:01.000Z');// Result : a moment ago
timeAgo('2019-06-15T15:03:01.000Z');// Result : 4 weeks ago

(11) AES 128 Encryption and Decryption
function encrypt($plainText, $key) {
 return base64_encode(openssl_encrypt($plainText, "aes-128-ecb", $key, OPENSSL_RAW_DATA));
}

function decrypt($encryptedText, $key) {
 return openssl_decrypt(base64_decode($encryptedText), "aes-128-ecb", $key, OPENSSL_RAW_DATA);
}
Syntax :
$encrypted = encrypt("Hello World!", "This is my key"); 
$decrypted = decrypt($encrypted, "This is my key");
echo "Encrypted : $encrypted";// Encrypted : P/W3C2v5A3wSPKAJk6JhVw==
echo "Decrypted : $decrypted";// Decrypted : Hello World!
thumbnail

Integrate Dropbox File Chooser/Picker into website


In this post, I will explain how to integrate Dropbox file chooser into website. The chooser is easy and fastest way to get files from dropbox without implementing all steps of authentication, user interface.

First, You need to register app in dropbox to get App key that is required in script.
After app is created, Keep "App Key" for later use and enter your domain name in "Chooser/Saver Domains" section. Use "localhost" for development.
Add the following JavaScript snippet to your HTML. Replace your App key in "ENTER_YOUR_APP_KEY"
<script type="text/javascript" src="https://www.dropbox.com/static/api/2/dropins.js" id="dropboxjs" data-app-key="ENTER_YOUR_APP_KEY"></script>

Triggering the Chooser from Javascript
There are two ways to trigger the Chooser on your website. To create nice styled dropbox button, you can use the following JavaScript:
var button = Dropbox.createChooseButton(options);
document.getElementById("container").appendChild(button);

If you prefer to design a custom button instead, you can trigger the Chooser directly from JavaScript using the following method:
Dropbox.choose(options);

Note that the Chooser opens in a pop-up window, so you should only call this function from within a user-triggered event handler such as a tap or click event. Otherwise, the pop-up will likely be blocked by the browser.

Both methods take a single options parameter with the following fields:
options = {

    // Required. Called when a user selects an item in the Chooser.
    success: function(files) {
        alert("Here's the file link: " + files[0].link)
    },

    // Optional. Called when the user closes the dialog without selecting a file
    // and does not include any parameters.
    cancel: function() {

    },

    // Optional. "preview" (default) is a preview link to the document for sharing,
    // "direct" is an expiring link to download the contents of the file. For more
    // information about link types, see Link types below.
    linkType: "preview", // or "direct"

    // Optional. A value of false (default) limits selection to a single file, while
    // true enables multiple file selection.
    multiselect: false, // or true

    // Optional. This is a list of file extensions. If specified, the user will
    // only be able to select files with these extensions. You may also specify
    // file types, such as "video" or "images" in the list. For more information,
    // see File types below. By default, all extensions are allowed.
    extensions: ['.pdf', '.doc', '.docx'],

    // Optional. A value of false (default) limits selection to files,
    // while true allows the user to select both folders and files.
    // You cannot specify `linkType: "direct"` when using `folderselect: true`.
    folderselect: false, // or true

    // Optional. A limit on the size of each file that may be selected, in bytes.
    // If specified, the user will only be able to select files with size
    // less than or equal to this limit.
    // For the purposes of this option, folders have size zero.
    sizeLimit: 1024, // or any positive number
};

Handling the response
The files parameter in the above success callback function will be an array of file objects, each containing info about the selected file. If multiselect is false, the array will contain a single item. Each file object includes the following fields:
file = {
    // Unique ID for the file, compatible with Dropbox API v2.
    id: "id:...",

    // Name of the file.
    name: "filename.txt",

    // URL to access the file, which varies depending on the linkType specified when the
    // Chooser was triggered.
    link: "https://...",

    // Size of the file in bytes.
    bytes: 464,

    // URL to a 64x64px icon for the file based on the file's extension.
    icon: "https://...",

    // A thumbnail URL generated when the user selects images and videos.
    // If the user didn't select an image or video, no thumbnail will be included.
    thumbnailLink: "https://...?bounding_box=75&mode=fit",

    // Boolean, whether or not the file is actually a directory
    isDir: false,
};

The thumbnail link contains query string parameters that specify how the thumbnail is generated. By modifying these parameters, you can construct URLs for other sizes and modes of thumbnails:
  • bounding_box Bounding box size for the thumbnail which must be one of the following values: 75 (default), 256, 800, 1280, 2048. 
  • mode One of the following resize modes:
    • fit default Shrink the original image maintaining the original aspect ratio until the entire image fits inside the bounding box. 
    • crop Shrink the original image until its width or height fits in bounding box, then crop anything outside the bounding box. 
    • fit_one_and_overflow Shrink the original image until its width or height fits into the bounding box but do not crop the left overs. The returned image will be larger than the bounding box. This is useful for situations where you need to use a square thumbnail but also want to use that image as a placeholder while you load a higher resolution version in the background.

Full example of dropbox chooser with custom button
<!DOCTYPE html>
<html>
    <head>
        <meta charset="utf-8">
        <meta http-equiv="X-UA-Compatible" content="IE=edge">
        <title>Dropbox chooser example</title>
        <meta name="description" content="">
        <meta name="viewport" content="width=device-width, initial-scale=1">
    </head>
    <body>
        <div>
            <input type="button" onclick="chooseFromDropbox()" value="Choose from Dropbox"/>
        </div>
        
        <!-- Dropbox javascript -->
        <script type="text/javascript" src="https://www.dropbox.com/static/api/2/dropins.js" id="dropboxjs" data-app-key="u6nbe57wdf1b07k"></script>
        <script type="text/javascript">
            function chooseFromDropbox(){
                //Trigger dropbox chooser
                Dropbox.choose({
                    success: function(files) {
                        //files is list of selected files (array)
                        if(files.length < 0){
                            return;
                        }
                        var file = files[0];
                        alert("Download Link : "+ file.link +"\nFile Name : "+ file.name);
                        
                        //Sent link to server and grab content in server side
                    },
                    cancel: function() {
                        //here is code when user close chooser
                    },
                    linkType: "direct", //Direct = Download link
                    multiselect: false, //Allow to select one file
                    extensions: ['.pdf'], //Allow to choose PDF file only
                    folderselect: false, //Not allow to select folder
                    sizeLimit: 1024 * 1024 * 2 //File size limit (2MB)
                });
            }
        </script>
    </body>
</html>

If you like this post, Please share it. Thank you for reading. 
thumbnail

Create android dropdown menu with PopupWindow


In this tutorial, I will show you how to create dropdown menu in android application using PopupWindow and RecyclerView with custom item layout.
First, we create popup menu layout with recyclerview.
<?xml version="1.0" encoding="utf-8"?>
<LinearLayout xmlns:android="http://schemas.android.com/apk/res/android"
    xmlns:app="http://schemas.android.com/apk/res-auto"
    android:layout_width="match_parent"
    android:layout_height="wrap_content"
    android:background="@android:color/white"
    android:orientation="horizontal">

    <android.support.v7.widget.RecyclerView
        android:id="@+id/rvCategory"
        android:layout_width="match_parent"
        android:layout_height="match_parent"
        android:scrollbars="vertical" />
</LinearLayout>

Then, We create popup menu custom class by extending PopupWindow.
public class CategoryDropdownMenu extends PopupWindow {
    private Context context;
    private RecyclerView rvCategory;
    private CategoryDropdownAdapter dropdownAdapter;

    public CategoryDropdownMenu(Context context){
        super(context);
        this.context = context;
        setupView();
    }

    public void setCategorySelectedListener(CategoryDropdownAdapter.CategorySelectedListener categorySelectedListener) {
        dropdownAdapter.setCategorySelectedListener(categorySelectedListener);
    }

    private void setupView() {
        View view = LayoutInflater.from(context).inflate(R.layout.popup_category, null);

        rvCategory = view.findViewById(R.id.rvCategory);
        rvCategory.setHasFixedSize(true);
        rvCategory.setLayoutManager(new LinearLayoutManager(context, LinearLayoutManager.VERTICAL, false));
        rvCategory.addItemDecoration(new DividerItemDecoration(context, LinearLayoutManager.VERTICAL));

        dropdownAdapter = new CategoryDropdownAdapter(Category.generateCategoryList());
        rvCategory.setAdapter(dropdownAdapter);

        setContentView(view);
    }
}

Inflate view from popup_category.xml layout file
View view = LayoutInflater.from(context).inflate(R.layout.popup_category, null);

Find RecyclerView by id
rvCategory = view.findViewById(R.id.rvCategory);

Set recyclerview as fixed size, vertical linear layout and divider.
rvCategory.setHasFixedSize(true);
rvCategory.setLayoutManager(new LinearLayoutManager(context, LinearLayoutManager.VERTICAL, false));
rvCategory.addItemDecoration(new DividerItemDecoration(context, LinearLayoutManager.VERTICAL));

Next step is create adapter and assign to recyclerview. Currently, we have not implemented Adapter class
dropdownAdapter = new CategoryDropdownAdapter(Category.generateCategoryList());
rvCategory.setAdapter(dropdownAdapter);

Set inflated view into PopupWindow
setContentView(view)

Create model class “Category” with 2 variables “icon” and “category name”. One static method to generate category list.
public class Category {
    public long id;
    public int iconRes;
    public String category;

    public Category(long id, int iconRes, String category){
        super();
        this.id = id;
        this.iconRes = iconRes;
        this.category = category;
    }

    public static List generateCategoryList(){
        List categories = new ArrayList<>();
        String[] programming = {"C++", "JAVA", "JAVASCRIPT", "C#", "Objective C", "SWIFT"};

        for(int i = 0; i < programming.length; i++){
            categories.add(new Category(i, R.drawable.ic_insert_emoticon_black_24dp, programming[i]));
        }
        return categories;
    }
}

Next step, Create recyclerview adapter class and implement 3 methods
- onCreateViewHolder = Create View Holder for each item
- onBindViewHolder = Bind data into view holder
- getItemCount = Return item count
public class CategoryDropdownAdapter extends RecyclerView.Adapter {

    private List categories;
    private CategorySelectedListener categorySelectedListener;

    public CategoryDropdownAdapter(List categories){
        super();
        this.categories = categories;
    }


    public void setCategorySelectedListener(CategoryDropdownAdapter.CategorySelectedListener categorySelectedListener) {
        this.categorySelectedListener = categorySelectedListener;
    }

    @NonNull
    @Override
    public CategoryViewHolder onCreateViewHolder(@NonNull ViewGroup parent, int viewType) {
        return new CategoryViewHolder(LayoutInflater.from(parent.getContext()).inflate(R.layout.item_category, parent, false));
    }

    @Override
    public void onBindViewHolder(@NonNull CategoryViewHolder holder, final int position) {
        final Category category = categories.get(position);
        holder.ivIcon.setImageResource(category.iconRes);
        holder.tvCategory.setText(category.category);

        holder.itemView.setOnClickListener(new View.OnClickListener() {
            @Override
            public void onClick(View view) {
                if(categorySelectedListener != null){
                    categorySelectedListener.onCategorySelected(position, category);
                }
            }
        });
    }

    @Override
    public int getItemCount() {
        return categories.size();
    }

    static class CategoryViewHolder extends RecyclerView.ViewHolder{
        AppCompatTextView tvCategory;
        AppCompatImageView ivIcon;

        public CategoryViewHolder(View itemView) {
            super(itemView);
            tvCategory = itemView.findViewById(R.id.tvCategory);
            ivIcon = itemView.findViewById(R.id.ivIcon);
        }
    }

    interface CategorySelectedListener {
        void onCategorySelected(int position, Category category);
    }
}

Main Activity has one TextView. When click the TextView, we call showCategoryMenu function and create PopupWindow.
public class MainActivity extends AppCompatActivity {
    AppCompatTextView tvPicker;

    @Override
    protected void onCreate(Bundle savedInstanceState) {
        super.onCreate(savedInstanceState);
        setContentView(R.layout.activity_main);

        tvPicker = findViewById(R.id.tvPicker);
        tvPicker.setOnClickListener(new View.OnClickListener() {
            @Override
            public void onClick(View view) {
                showCategoryMenu();
            }
        });
    }

    private void showCategoryMenu(){
        final CategoryDropdownMenu menu = new CategoryDropdownMenu(this);
        menu.setHeight(WindowManager.LayoutParams.WRAP_CONTENT);
        menu.setWidth(getPxFromDp(200));
        menu.setOutsideTouchable(true);
        menu.setFocusable(true);
        menu.showAsDropDown(tvPicker);
        menu.setCategorySelectedListener(new CategoryDropdownAdapter.CategorySelectedListener() {
            @Override
            public void onCategorySelected(int position, Category category) {
                menu.dismiss();
                Toast.makeText(MainActivity.this, "Your favourite programming language : "+ category.category, Toast.LENGTH_SHORT).show();
            }
        });
    }

    //Convert DP to Pixel
    private int getPxFromDp(int dp){
        return (int) (dp * getResources().getDisplayMetrics().density);
    }
}


Download full source code
https://github.com/winkoko33/AndroidPopupWindowDropdown

If you like this post, Please share it. Thank you for reading. 
thumbnail

How to reduce PDF file size online!


PDF file size is so big and difficult to share?

In this post, I want to share how to compress PDF file without install any software and the whole process will do online. It is free service, no watermark and no sign up. Supported up to 500 MB file size.
(1) Navigate to this website “https://www.naingdroidapps.com/
(2) Drag and drop your PDF file in the box or Choose file. You can also choose from Dropbox and OneDrive cloud storage.
 (3) Just wait to finish compression
After complete compression, It will show compressed file size. Just click “Download” button to download your compressed file.


If you like this service, Please share with your friends and colleagues. Thank you for reading!